Thursday, June 27, 2013

Box Project 4 - Cleaning off that Old Veneer


The first step in redoing the box is to get it down to a clean surface that I can work with which brings me to removing the veneer.  I got the greater part of the old veneer off with just my fingers.  But there was the rest of it that was clinging on for dear life. 
I could tell by the brown crystals I could see in the wood grain that the original veneer had been put on with hide glue - the real stuff cooks out of animal tendons and hooves and such.  It is still used today particularly on things like musical instruments.  The reason for this is that it has the excellent property of holding things like iron while dry and letting go when it is heated with steam.  That way a guitar or violin that has been assembled with it can be disassembled for repair without damaging the wood.  I wrote a small book on this a while back.  (Heath, Maya, A Practical Guide to Medieval Adhesives, Issue 134 of The Compleat Anachronist, Society for Creative Anachronism, 2007.) I did a lot of research and experimentation with various kinds of pre-industrial glue for this. What made me cautious was the delicate under surface of the carcasse wood and the less than robust condition of the box as a whole.  I didn't want to have to do a lot of digging and prying to get it to let go.  All the blogs and videos on the internet I could find deal with flat surfaces.  Getting steam and heat to this compound curve were going to be a challenge. 
I took an old wash rag and got it wet just a little drier than dripping, folded is in thirds and laid it on the veneer I wanted to remove.  I took an iron and heated it up to maximum, then laid it on the wash rag. 
I didn't leave it on there long - maybe 10 seconds while I picked up the camera and took a couple of pictures.  There wasn't much danger of the rag burning as it was hissing and chortling steam like crazy.  Then I lifted it off.
Using an old cake spatula I began to try lifting the edges - GENTLY.  You don't want to be digging at the wood, just letting the heat and steam do its work.  The edges began to lift up.  I had to apply the rag and iron a couple of more times before it lifted away altogether.  The key here is that you have to work with the glue and veneer are still really warm to the touch.  Once it cools, its set again. 

It took a bit of patience working one area at a time.  It didn't always come off in convenience large pieces, but eventually it did all come off. 
Now it needs to sit a while drying out.  I didn't get it damp to the touch, but all that steam forces itself into the wood grain.  So it needs a few days peace and quiet before I hand it over to Phillip to glue back together.

Sunday, June 23, 2013

Box Project 3 - Researching Finishes

A large part of any project seems to be the research that goes into the processes and techniques needed to achieve it.  Now that I've decided to paint the box, my next step was to find out how to do that and get a really authentic look to it.  The history of Chinese and Japanese lacquerware (urushiol-based lacquer)
is a long and impressive one.  When done right, the result is not only beautiful, but the lacquer itself cures through oxidation and polymerization to form a a kind of natural plastic that is extremely robust and can last over a thousand years.  The process of applying it is long and arduous and includes lots of noxious and toxic vapors even if you can find the authentic ingredients and complete step-by-step instructions.  Not to mention that, if you don't know what you're doing, getting it on your skin can result in "urusiol-induced contact dermatitis".  And having read enough about exotic tree resins from sou-east Asia I decided that there had to be a better way that I personally could achieve good results. 

There are all kinds of commercial lacquers out there both acryllic based and nitrocellulose.  But the first thing their labels mention is about how to paint a car.  Somehow I don't think this is what I have in mind.  There are water-based lacquers too.  But the general consensus is that the finish they produce is relatively fragile.  If I am going to put all this effort into something I want it to last.  So moving on......

Then I came to "Japanning".  Oriental lacquerware was quite popular in the late 17th and 18th centuries.  Due to the high cost of importing both the goods and the materials, Europeans developed imitations of their own that were effectively a different technique of lacquering based on shellac.    I finally located a plain-spoken practical source on how to do this.  The Handbook on Japanning: 2nd Edition by William Norman Brown,  D. van Nostrand, New York, 1913.  Although most of the book is about applying japanning to metal as an enameling technique, the fir 11 pages are all about applying it to wood.  From the first step of preparing the surface, to priming and then application, it leaves out nothing.  Complete with exact recipes not only for the varnish itself but for exactly how to put which pigments in it to achieve the color you like.  The language is stilted and pedantic and I will have to take some time taking it from antique book to studio notes, but with a little effort all the information is laid out one step at a time.  I have painted icons before and am familiar with this technique of sizing and gesso-priming a surface.  It will take patience and care, but I think it's well within my scope to be able to turn out a creditable outcome. 

Friday, June 21, 2013

Box Project 2 - Bits and Beginnings

My first step with the box is to get it to the point that it can be glued.  Right now its covered in pealing shards of veneer.  some of it has come off with the slightest touch; some of it needed a little help from fingernails and a palette knife.  The rest is proving to be stubborn.  I can tell from the brown/amber crystals here and there when the pieces pop off that it was all originally put on with hide glue.  This may prove to be a blessing in disguise because I know from the research I did for the glue book that hide glue will let go with steam.  So probably tomorrow I will address the issue with hot damp towels and a steam iron.  The Phillip can glue the very loose pieces back together. 

That being said, I've turned my attention to how I will eventually decorate it.  Neither Phillip nor I have the time, patience or (probably) skill to redo the veneer entirely.  But in my researches I have found that many of the boxes like this were decorated with paint in a technique called "penwork". 
It comes in two varieties, polychrome and monochrome. Often it is decoration in gold or color on black.  Sometimes it is similar decoration on gold or ocher and sometimes a combination of the two with side panels in a decorative motif in monochrome with a figural panel on the top in polychrome or vice versa. 


 But as you can see, it isn't limited to that either.  There is also red backgrounds and verdigris green.  Unlike Medieval and Renaissance boxes referred to as "polychromed wood", these boxes seem to be done in a process more akin to Russian Palek boxes.  A box is covered first with a primer, then several layers of black lacquer.  Then the design is put on in metallic paint and painted over with colors.  The whole thing is then covered with several layers or clear lacquer.  (http://www.russianamericancompany.com/lacquer-box-making/) This is a lot more robust and durable than regular polychroming which is paint over layers of gesso.  I think I can make a decent stab at pretty design work that, while it may not be up to Palek box standards, may be nicely done nonetheless.  Time to dig out my air brush and see if it will suit the lacquer.

And while we're on the subject, how about those brass hairy paw feet.  I know I can do them as I already made feet like that for another box and I still have all the molds.  All-in-all this may take what seems like forever, but if I'm careful and do it right it could turn out splendidly.  Be that as it may, I still have to be about the very tedious business of removing that veneer.  But its dreams like this that keep me going.

Box Project 1 - A New Project - A Regency Box


I see by the dates its been nearly a year since I posted here.  Maybe its something about summer and being shut in the house with the air conditioning droning on and on.  And maybe its summer that makes me think in terms of embarking on long-term projects.  No, I always think in terms of really big projects. LOL  This time the idea was sparked by members of an embroidery list I belong to.  One of the members has been posting pictures of gorgeous Palais Royale sewing boxes.  Richly glowing exotic veneer coffers laden with exquisitely carved mother-of-pearl sewing tools such as would have been used by Marie Antoinette and her court ladies.  Understandably, there has been lots of cooing and twittering about how really delicious these boxes are. 
Then another member had this brilliant suggestion - why don't we each make such a precious box.  Embroidered interior, lovely exterior, a home for our best tools and treasures.  Of course, there were a certain number of us who instantly rose to the bait.  I'll admit it, I love beautiful sewing tools and I am a total sucker for precious beautiful boxes.   Once Phillip referred to me as the "Container Queen".   Guilty as charged.  I have a few carved and painted ones - even a couple I've done myself.  But Palais Royale ?!?....  So I shared all this with Phillip knowing that he'd be amused at the tempest in the embroidery teapot.  And then he asked me "So are you going to use The Box?"

Yes, there's a back story here.  In the world of antique restoration, Phillip's father was a recognized genius when it came to finding and bringing old things back to life.  Living around his shop was like being present at an ever-revolving museum show.  Every time he opened his truck it was a new Cave of Wonders.  Then when the pieces left to make their debut at another show, they were glowing with renewed life.  Sometimes he bought whole job lots of things that included things he didn't really want or never got around to dealing with.  Mostly small things.  He passed away last year after a lingering illness and his shop of 40+ years got gradually cleaned out.   One afternoon Phillip came in with a box he'd found under a pile of trash and sawdust.  Filthy, pealing its veneer at every touch, threatening any minute to disassemble itself to splinters - but underneath all that, voluptuously curved and elegantly domed.  The poor ruin of what was once a lovely Regency box - perhaps for stationary, perhaps for sewing.

He knew I would like to see it even in its present tragic state and, of course, I couldn't let him just toss it out.  So, it has lived on a shelf in my work room ever since - waiting...  Because I don't have the skills to do the re-gluing of its compound surfaces. Last night, at his suggestion, we looked at it again and he judged that, with the right skill set, it could be reglued and begin its journey to a new life.  He promised to put it back together so I can do the rest.  I certainly have no Palais Royale tools, but I do have some lovely bone ones that Phillip has carved.  But it is far from having a padded tray full of lovely tools.  Just for now, it will be enough to get the rotten veneer off the frame and get it glued together.  I am thinking that it will not have any veneer replaced.  Rather, I will cover it with muslin and gesso and polychrome it like the ones they call "Chinoisserie".  That will stabilize the box and maintain a period look to it.  We will see what comes.  Right now the fun is having a head full of ideas and a project of Great Potential.

Sunday, July 22, 2012

Finding My Voice

Its been a while since I posted anything - and indeed its take a while to get my head around the larger world of quilting and fiber arts.  I have certainly bee overwhelmed by the complexity of it all and how much there is to see and experience.  I think the major challenge was asking myself where my own voice was int he midst of it all.  And while I certainly haven't found all of that, I have found some small corner of it that I enjoy and can relate to. I have made a beginning at finding some few skills and a comfort zone.  I find that I am heavily influenced by all the embroidery I have done.  Karen talks about a quilt being something you can wrap yourself in - or wrap a child in for comfort.  And I get that; I really do.  I see the ladies int eh quilt guild turning out blanket sized quilts so casually and I really admire that.  But when I sit down to think about what I really want to do myself my brain automatically defaults to what I can hold in my hand and manage with a needle.

  It was only a matter of time before I found applique and wonderfully intricate small things.  My first discovery was Shelley Swanland and her technique called Cathedral Windows.  Its base on an old technique form the 30's but way more updated and versatile - a way of layering and folding fabric that gives color layers and tactile possibilities that are really exciting.  So after a test piece or two I found her little flower "twilt" (that I donated to the AAQI) and a framework she did for a large centerpiece that was just too intriguing not to try.  So it started out as something to do for that frame.  A piece for my daughter to celebrate her new apartment.  A hamsa hand for good luck and prosperity.  Well... simple is how it always starts, isn't it.  I found colors that felt like her and the it just had to have more - like shisha mirrors and embroidery - and then tassels - and after that bells on the bottom.  And finally I got around to that frame.  Fro something only 14 inches wide it certainly has a lot to say for itself.

Well - are we there yet? No, not quite.  After a grand and glorious project like this the only logical question is "What next?"  And with such an open question of course the Universe by way of the Interwebz will, of course, be quick to oblige.  I saw an odd posting of a detail from a quilt that someone had taken at a quilt show.  So sad she didn't have the name of the artist but it gave me a good idea.  And with a few adjustments (of course) it became a dragonfly that I used as a front panel for a carryall for my cousin.  She's going to be traveling here and there - doing readings, giving lectures, being out on weekends - she needed something special to carry her things in - something really uniquely her - and she loves dragonflies.  Then not to leave anything out I gave it flowers from that first flower pattern.  And of course the mirrors in the flower centers - and of course all kinds of embroidery.  This caused Phillip to describe it as"yet another Cistine Chapel project" and yes - he's right.  I mounted it it as the front flap on a bag with lots of pockets inside and out.  made out of sturdy faux suede upholstery fabric so it will go the extra mile and not fray or break. 

But once its done - and shipped - and she has it - and she was so pleased with it that she got all teary eyed - I am once again faced with the question "What next?"  Since I've given my first 3 away, maybe its time to make one for me.  and lately I've been looking at lots of pictures of peacocks...   well....

Each time I do one of these smaller projects I learn things and get more certain of what I'm doing.  I feel less at sea and more in control.  Those larger projects are getting designed and drawn up.  I have them tucked in my sketch book and I'm saving back fabric for them as I find it.  They will come in time.  But for right now I'm being all happy with my little tempests in teapots.  And we shall see what kind of tempest that peacok will provide

Friday, December 16, 2011

Getting Past the Dazzle

If there's one thing I have found out for certain recently its that its so easy to get sucked in by the dazzle of it all.  After all, the  ~WOW~ factor is huge.  Also is the idea that it is very much possible to recreate this oneself.  You don't have to have an art school degree to have this kind of beauty in your life, just time and patience and some skill with a needle.  If you aren't up to generating your own patterns, there are certainly plenty of patterns out there that you can fill in with your own colors and sense of style.  The allure is enormous.  And I have certainly been out there on the internet, trawling for pictures and ideas, collecting images of inspirations like a high school girl collects pictures of movie stars.  Now I'm at the point of working to get the skills to match up to my aspirations.  Taking quilting classes at the quilt shop helps a lot - getting the skills.  Joining a quilt guild helps too - lots of nice folks there to encourage a newbie.  I managed to make that blue and green block myself - unsupervised.  Now I need to actually dig into the tiny stash I brought home from Houston and start on a real quilt.  Although I've been an artist all my life, and have designed embroidery patterns and jewelry for years, I am really excited about doing this.  I have fabric, a sort of a pattern, a good sewing machine, and friends who will help if I get in too deep - who could ask for more.  The center panel is Laurel Burch's Celestial Dreams.  What could be more apt than a lady with a cat dancing in a sea of celestial rainbows and flowers.

Friday, September 23, 2011

Butterflies


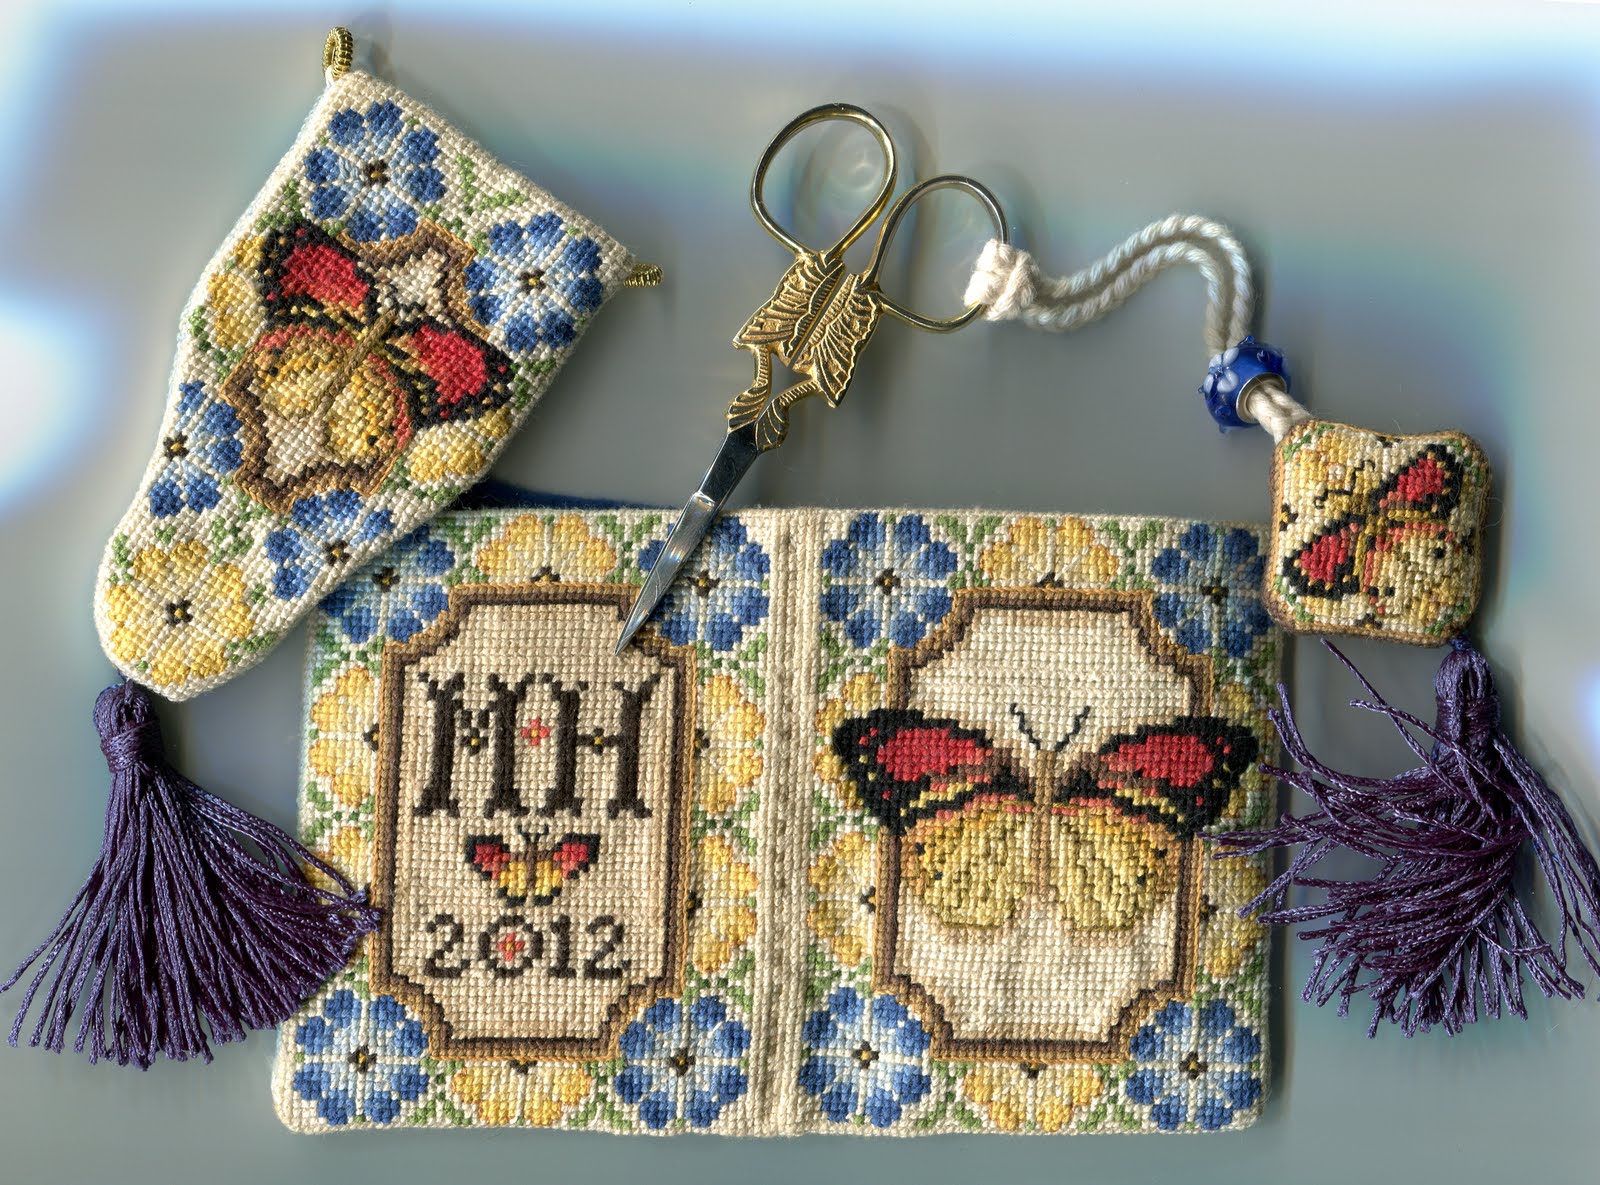
I’ve been working on the Butterfly series for a while now and liking the design more and more. I never thought of myself as a butterfly sort of person – all that fussy lightness just doesn’t’ feel like me actually. But there is something about this design that just resonates (well it should because it is, after all, my design – butterflies seen through my own particular lens). I’m not doing it because I thought commercially butterflies would be a good idea (which they are and it will be). This started as a design with an antique border pattern of flowers that I found in a very very old pattern book, and, by the time I was done, it was flowers and butterflies and antique monograms. The more I developed it, the more I enjoyed it. I am calling the pattern “Butterfly Memento” – because what I see is that its a moment in time – a summer day – poised and perfect with flowers and that butterfly – the butterfly itself is a moment – poised so briefly transforming from one state to another. A day, no matter how perfect, is always changing – like the flowers and the butterfly – you can’t press them or hold them – but you can remember them at that one perfect moment. So the colors are clear and bright, the frame and background are antique – the lettering and monogram are quaint. Even the blue flowers are Forget-Me-Nots.

As I look at this and do the work, I’m beginning to see that I’m redefining myself. Actually this whole process of the designs and the kits and all has been a process of redefining myself that I really didn’t notice until recently. I remember clearly the sense of rightness and joy I had when I decided to embark on this. With each series of designs I have found parts of my artistic self that have been just waiting to be explored that somehow I never found a way to reach before. I am comfortable with this in empowering ways. I have always found my way through a time of change by creating something – a major cycle that totally absorbs me and transforms the way I see myself and the way others see me. As I look back I realize that its embroidery that has always led me to the most positive parts of my artist self. Jewelry was the way I made a living – hard work – connected with lots of stress. I will not deny that jewelry has been how I kept us all alive and how it led to most of my public life. I have done well at it and I’m pleased with that. But embroidery is my special treasure – my private personal ting that has led me to recreate myself almost literally. It has always been my gateway in the SCA – how I manifested first Koshka and not Safiya – the vehicle/bridge that opened into the artistic communities. Interestingly enough embroidery, is the only art or endeavor that my grandmother unreservedly praised me for. Everything else was “yes, but” – embroidery was just fascinated praise. So I’m following that – living from the heart and letting that transform me.

I will admit to the base level of core programming that is our beginning definition. If it is my grandmother’s voice that shapes my personal definition, then I will let it be this. I will choose the healthy positive framework for this new growth – I will listen to the positive voice but from the past and from my own heart. Its right and fitting that embroidery can open me up to the wider world and expand my spirit. So, yes, the Butterfly Memento – its a good image for this Now.